


One issue that I have run into multiple times in the past is how to manage multiple GitHub accounts on my local machine. Whether you are working on git repositories from multiple clients or you are switching back and forth between personal and the company accounts, almost every developer will eventually encounter this problem. Also for me, I end up looking it up every time I set up a new machine 🤐
So here is a quick reminder of how to go about this, because it does need a little setup to work nicely.
Table Of Contents
Getting Started
Use SSH instead of HTTPS
To set up different accounts on your local machine, we will be using SSH keys instead of the usual HTTPS connection. This has its advantages and disadvantages, and GitHub occasionally changes its opinion on what it recommends best, but here is a quote from the GitHub docs on why we will use SSH keys in this case.
Using the SSH protocol, you can connect and authenticate to remote servers and services. With SSH keys, you can connect to GitHub without supplying your username and personal access token at each visit.
- Github | About SSH
Perfect for us. We don't want to reauthenticate every time and instead commit changes to our repositories as if we never switched accounts. But how do we set that up?
A quick note here: if you would like to learn more about the differences between HTTPS and SSH, there is an extensive write-up in the GitHub docs! It's worth checking out!
Understand the structure of SSH on your local machine
To put it simply: the way this will work is to create unique keys (SSH keys) on your local machine that we will then add to your Github accounts. GitHub won't have to look up your login credentials every time then and instead can verify you by your SSH key. Sound pretty good, right?
But where do the keys get stored on your local machine?
In a folder called ~/.ssh. This is where our setup will happen. Instead of having to set up configuration every time we clone from one of our accounts, once we have made our SSH setup in this folder, we just clone and commit to repositories from different accounts without ever thinking about having to switch accounts on your local machine!
Let's get started!
Set up your local SSH config
If you were to look for your ~/.ssh folder, you might notice that it doesn't exist yet, if for example you never created any keys previously. But instead of creating the folder now ourselves, let our machine do that for us. We start by creating our first key.
Generate SSH keys
When we create SSH keys on our machine, it automatically generates some files and configurations for us. In this tutorial, we will assume you haven't set up any SSH keys yet.
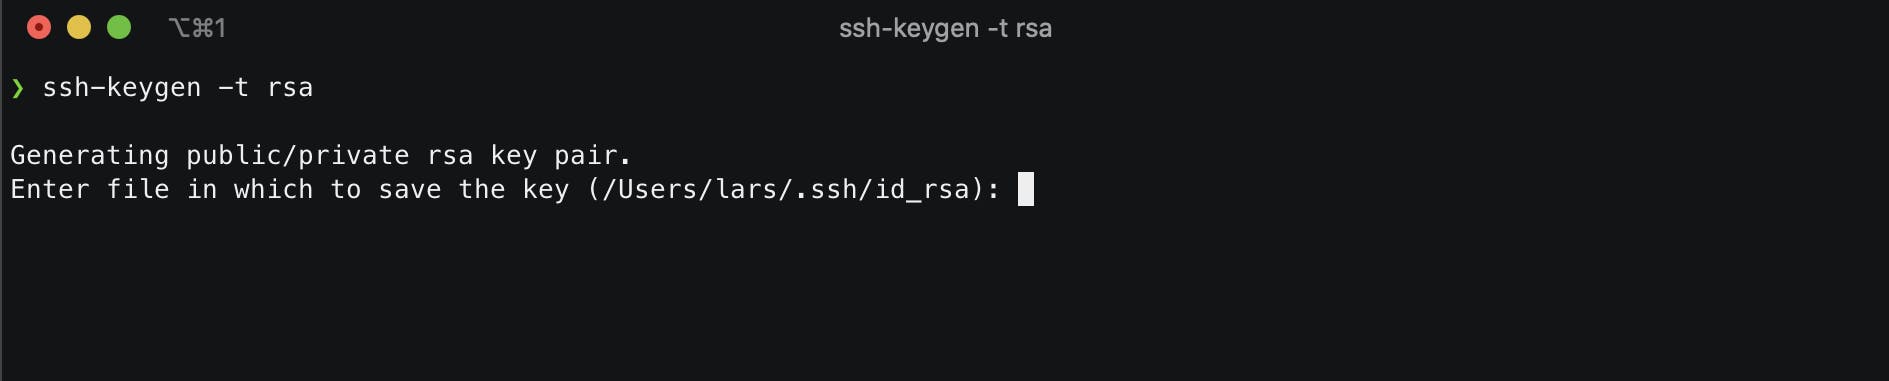
We get started with the command that will generate the first key:
ssh-keygen -t rsa
You will be prompted and asked to enter the folder/file name you want to go with. Press ENTER to go with the default location and generate the ~/.ssh folder.
You now have a ~/.ssh folder, with the just created SSH key. Let's use this default key for our personal account.
Next up is creating a key for our work account. (You can repeat this process for as many keys as necessary) And for this we will have to specify the key with some flags. "-C" adds a comment/tag and -f specifies the name of the file we want to save the key to.
Go into your ~/.ssh folder:
cd ~/.ssh
And create your next key with custom flags.
ssh-keygen -t rsa -C "email@githubworkemail.com" -f "id_rsa_workname"
To dive deeper, here is a list of the different flags you can add:
To double-check that all of your keys are there, type:
ls ~/.ssh
Create a config to manage multiple keys
Now that we have created our keys, we need a configuration file that knows which key to use when we access a repo of one of our GitHub accounts.
For this inside our ~/.ssh folder, we create and open a config file.
touch ~/.ssh/config && code ~/.ssh/config
In here we define our different accounts:
# personal account
Host github.com
   HostName github.com
   User git
   IdentityFile ~/.ssh/id_rsa

# work account 1
Host github.com-workname
   HostName github.com
   User git
   IdentityFile ~/.ssh/id_rsa_workname
Two things are important to note here:
The host, which we will need to remember later when we get our SSH links from GitHub.
Host github.com-workname
and the identity file, to make sure it points to the correct SSH key that we created before.
IdentityFile ~/.ssh/id_rsa_workname
Register our ssh-agent
Now to keep track of our different SSH keys and their configurations, there is a service called "ssh-agent". It is essentially the key manager for SSH.
For our purposes, we need to know 3 different commands.
ssh-add -D              // removes all currently registered ssh keys from the ssh-agent
ssh-add -l              // lists all currently in the ssh-agent registered ssh keys
ssh-add ~/.ssh/id_rsa   // adds the specified key to the ssh-agent
If you haven't configured any keys previously your ssh-agent has most likely not registered any keys, but let's be completely sure and run:
ssh-add -D // removes all currently registered ssh keys from the ssh-agent
Next up is registering our keys with their ids:
ssh-add ~/.ssh/id_rsa && ssh-add ~/.ssh/id_rsa_workname
Done! With this, our local machine is set up and all that is left to do is to register our keys in GitHub and clone our first repo!
Add the SSH keys to your GitHub accounts
There are two steps to this. First, copy the correct key and second, add the key in your dashboard on GitHub.
Copying the correct key.
pbcopy < ~/.ssh/id_rsa.pubThis will copy your public key to your clipboard
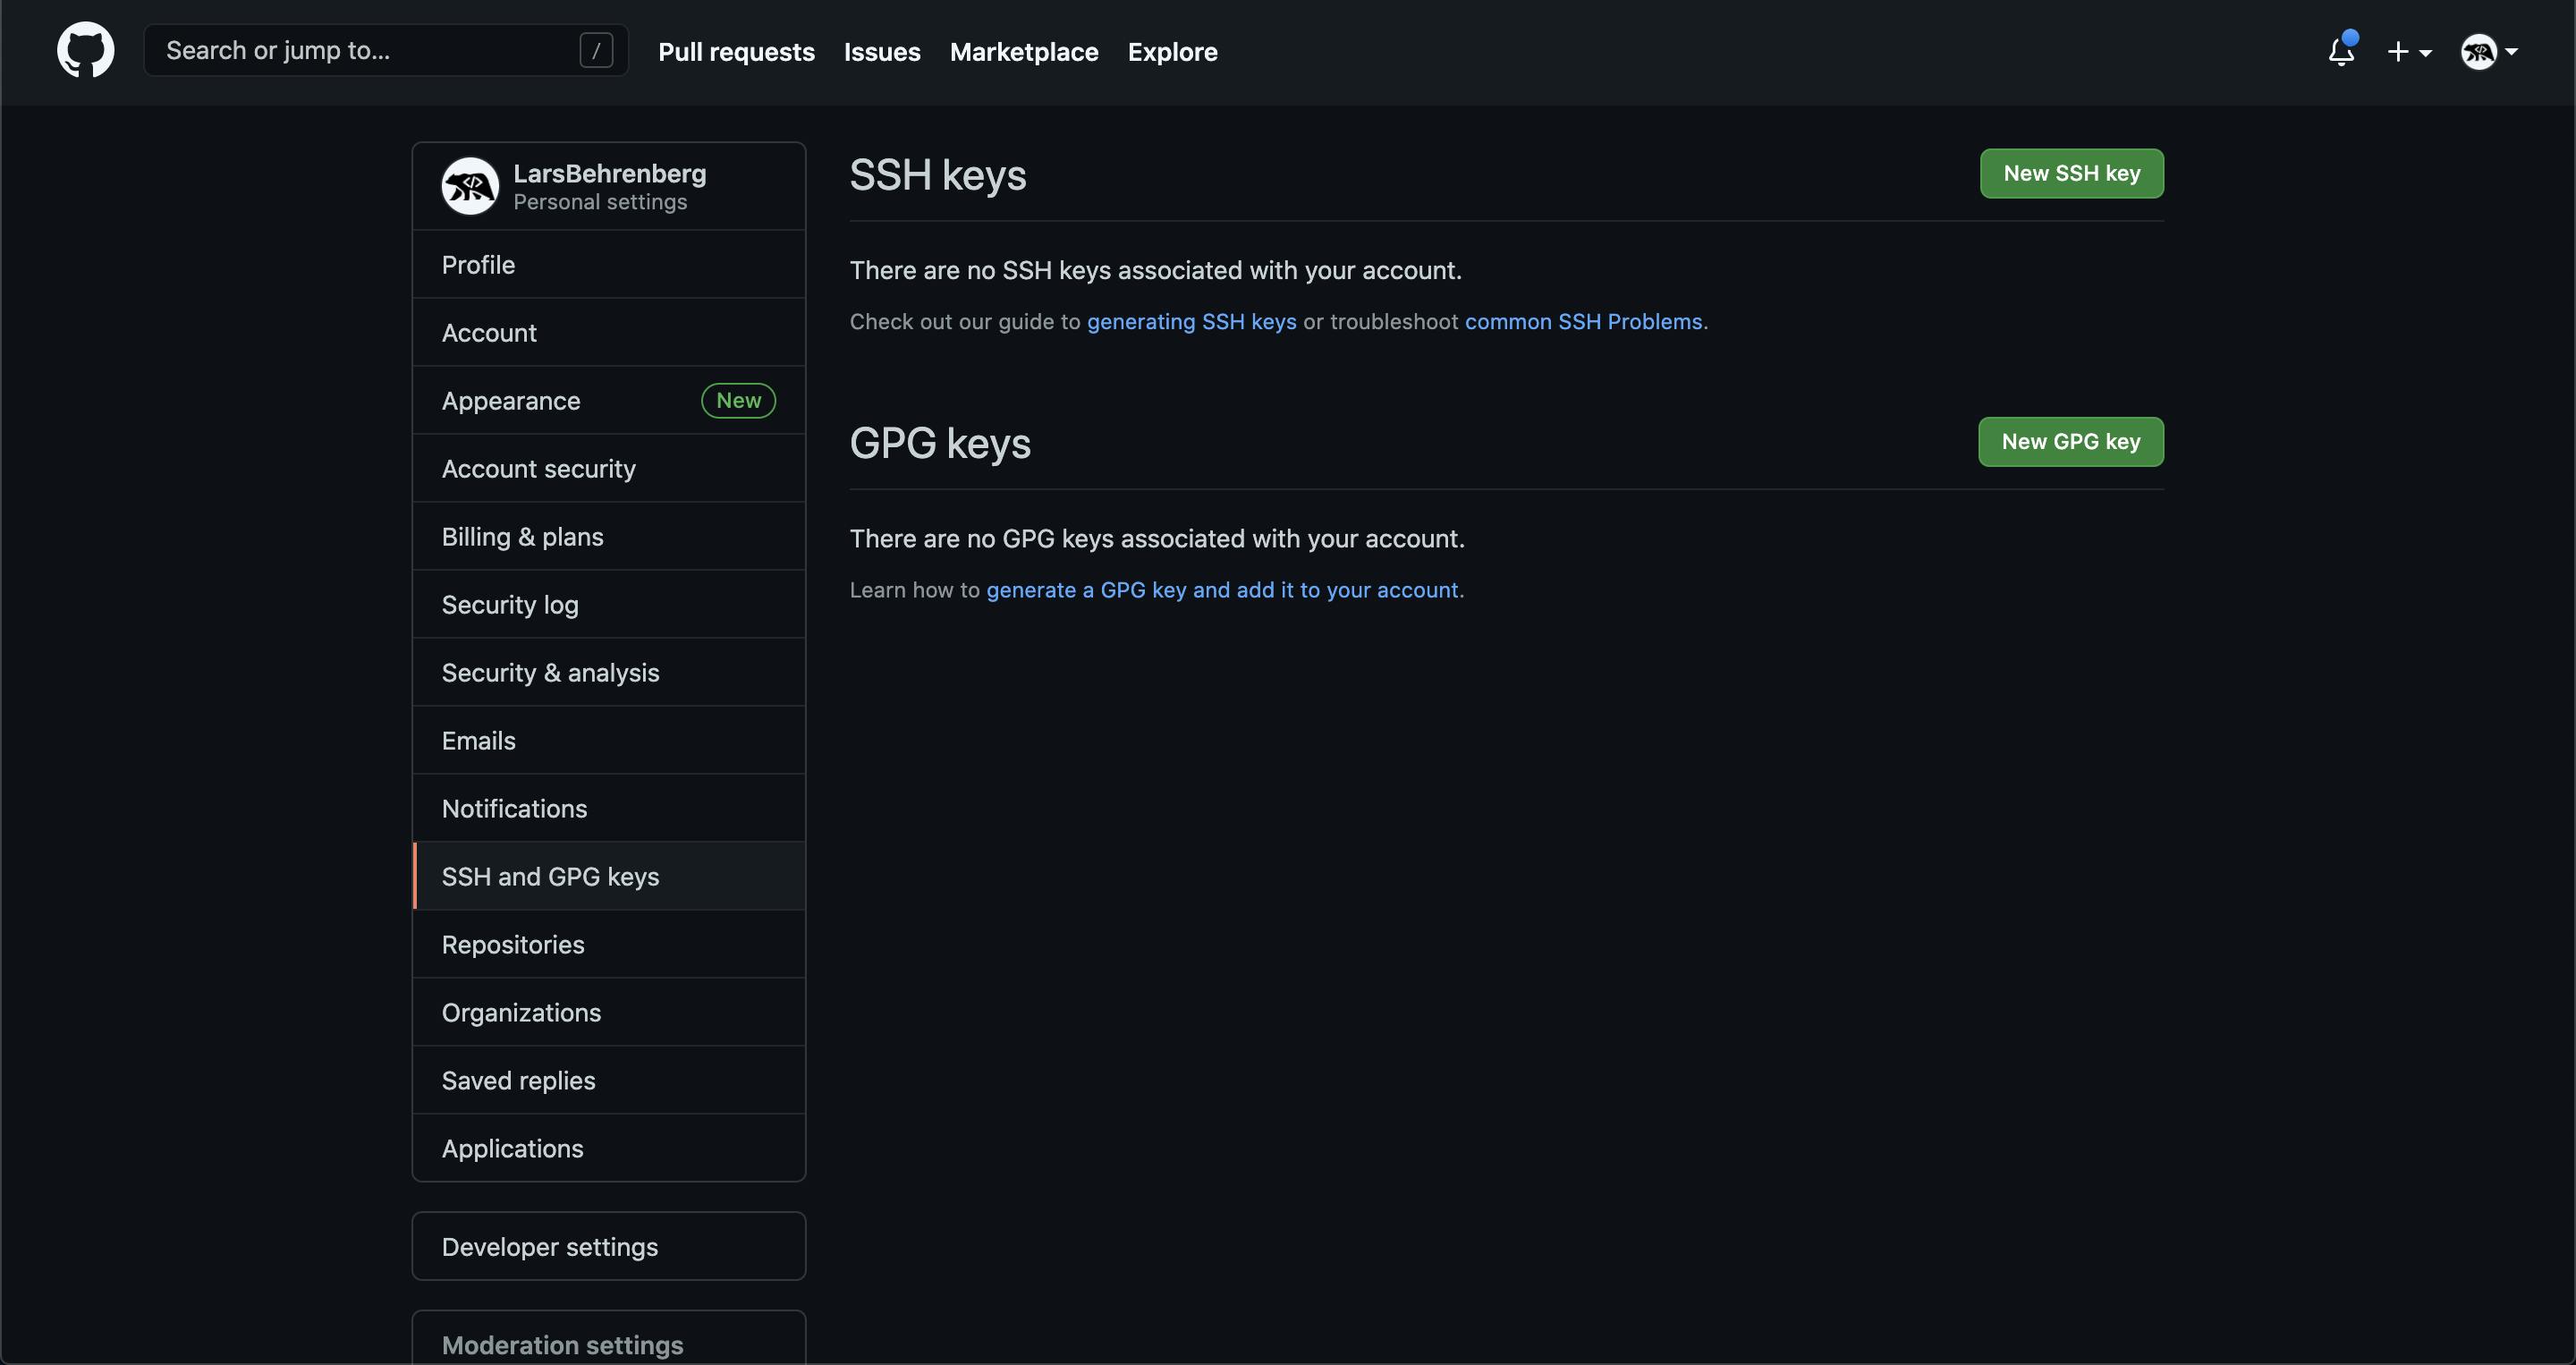
Add the key in your dashboard at https://github.com/settings/keys.
Login into your work GitHub account and repeat this process with your work SSH key.
Clone your repo
Important to note! The reason why your computer knows which SSH key to use, is because we defined the URL in our config file.
This means that for our work repositories, when we clone a repo from the account, like so:
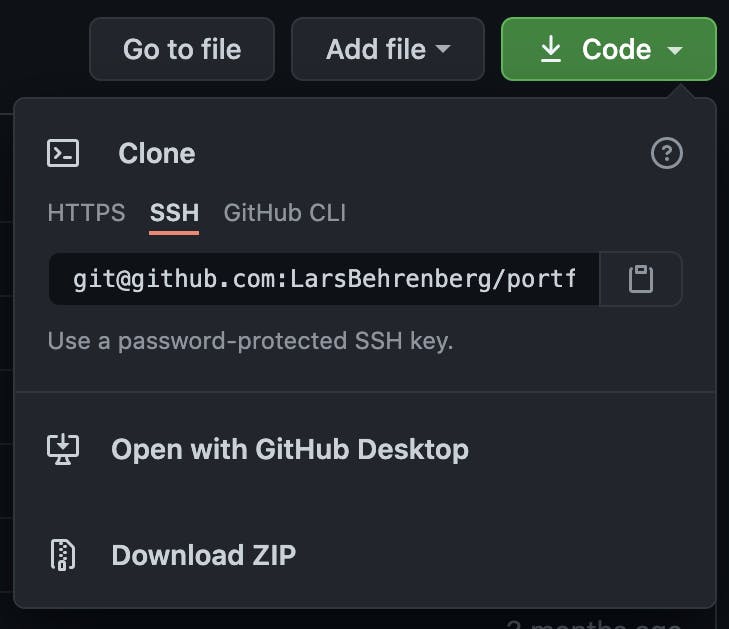
We have to change the URL from:
git@github.com:workname/repo.git ⇒ git@github.com-workname:workname/repo.git
The same URL we have previously defined in our ~/.ssh/config file.
**Host github.com-workname  // HERE**
   HostName github.com
   User git
   IdentityFile ~/.ssh/id_rsa_workname
With this, you can now clone your repositories and get going! Back to coding, I'd say!
That’s it!
Thanks so much for reading this far and feel free to reach out to me anytime, on my website or on Twitter 🙂