The definitive iTerm2 & Oh-my-ZSH Setup on macOS
Oh My Zsh will not make you a 10x developer...but you may feel like one.
Once installed, your terminal shell will become the talk of the town or your money back! With each keystroke in your command prompt, you'll take advantage of the hundreds of powerful plugins and beautiful themes. Strangers will come up to you in cafés and ask you, "that is amazing! are you some sort of genius?"
Are you sold yet? I am for sure. So, let's get started!
Table Of Contents
Installation
To get started, we have to install a few things first. Starting with iTerm.
You can simply download iTerm from its website, but since you are I assume a terminal user, I highly recommend you to use Homebrew. Think of HomeBrew as a package manager to install and manage software on macOS. We will be using it to download iTerm, but you can use it to download lots of other packages as well.
First, if you don't have already, let's download and install Homebrew.
/usr/bin/ruby -e "$(curl -fsSL https://raw.githubusercontent.com/Homebrew/install/master/install)"
Then let's use Homebrew to download and install iTerm 2:
brew cask install iterm2
Install zsh and oh-my-zsh
- Once this is done, we will open up our new iTerm application to install zsh and oh-my-zsh.
brew install zsh && sh -c "$(curl -fsSL https://raw.githubusercontent.com/robbyrussell/oh-my-zsh/master/tools/install.sh)"
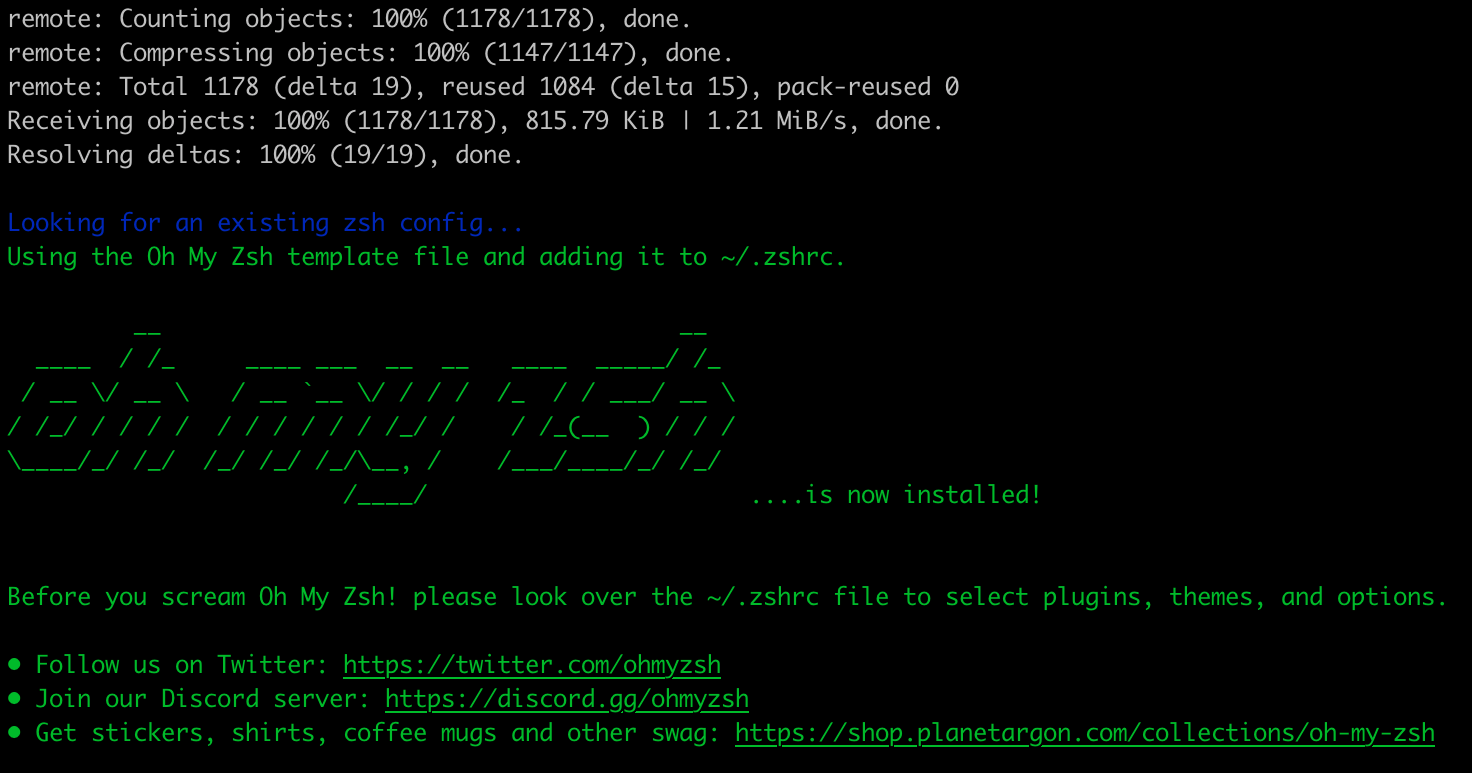
The oh-my-zsh install will replace your default terminal with zsh automatically when installed.
Now, that we have the basic installation out of the way, let's make sure everything looks nice before we get to set up more functionality. Let's get to style our terminal.
Styling
Set your Color Scheme
iTerm already provides different color schemes out of the box, but there are also many on the internet, free for you to download. And of course, feel free to go with a different one than the one I go with below! Here is a list of lots of different themes to download:
My current personal favorite is the iTerm Material Design based on Google's popular Material UI colors. However, I manually set a darker background color, to match my dark mode UI better. Somewhere around #121415.
To download the color theme, simply copy the code below into your terminal:
cd Downloads && curl -O https://raw.githubusercontent.com/MartinSeeler/iterm2-material-design/master/material-design-colors.itermcolors
This will direct you into your Downloads folder and download the color preset to that directory for you.
Following this, we need to tell iTerm to use the preset we just download. For this, you open iTerm 2 and press "CMD + , " which will open up your iTerms preferences.
Select the Profile tab and Colors Tab. Right there at the bottom right, you can find the color preset option.
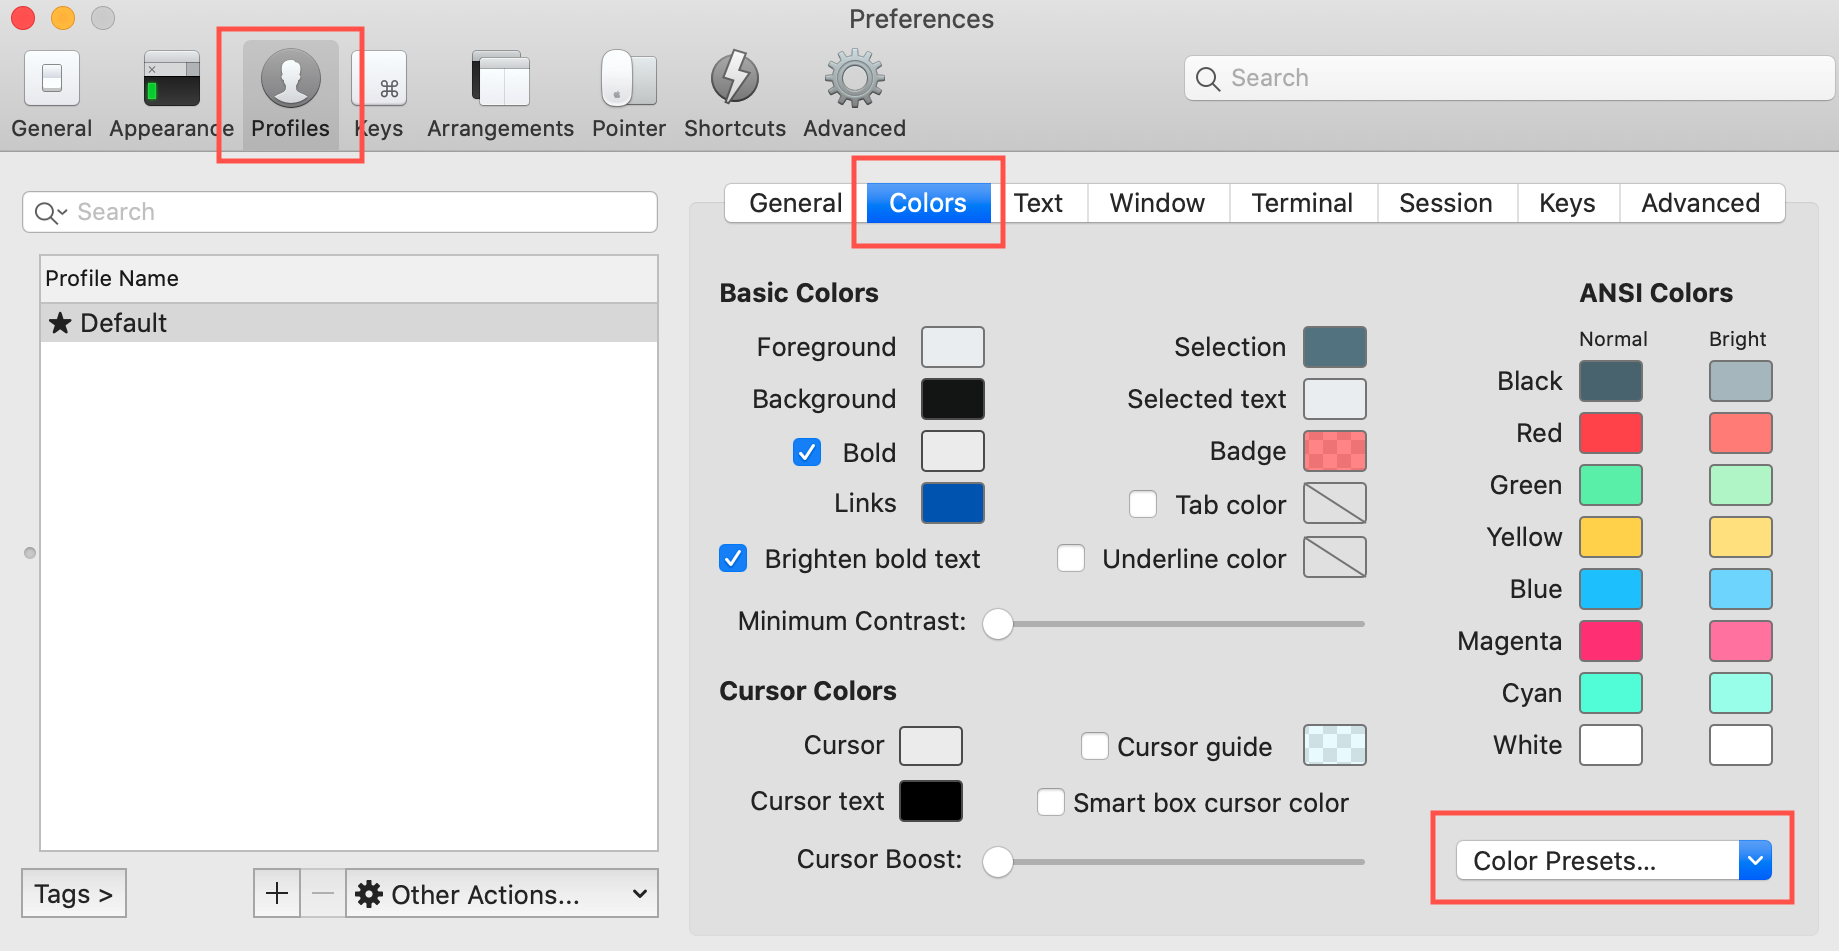
Press the Color Presets select and choose "Import", to import your previously downloaded color preset from the Downloads folder.
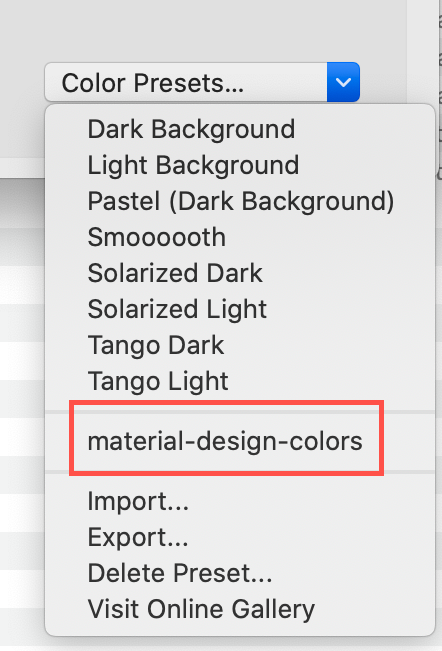
Now, don't forget to also select the preset once you have imported it. It will show up in the list just like this:
One last step for me, is to change the background color here, to get the "darker" mode:
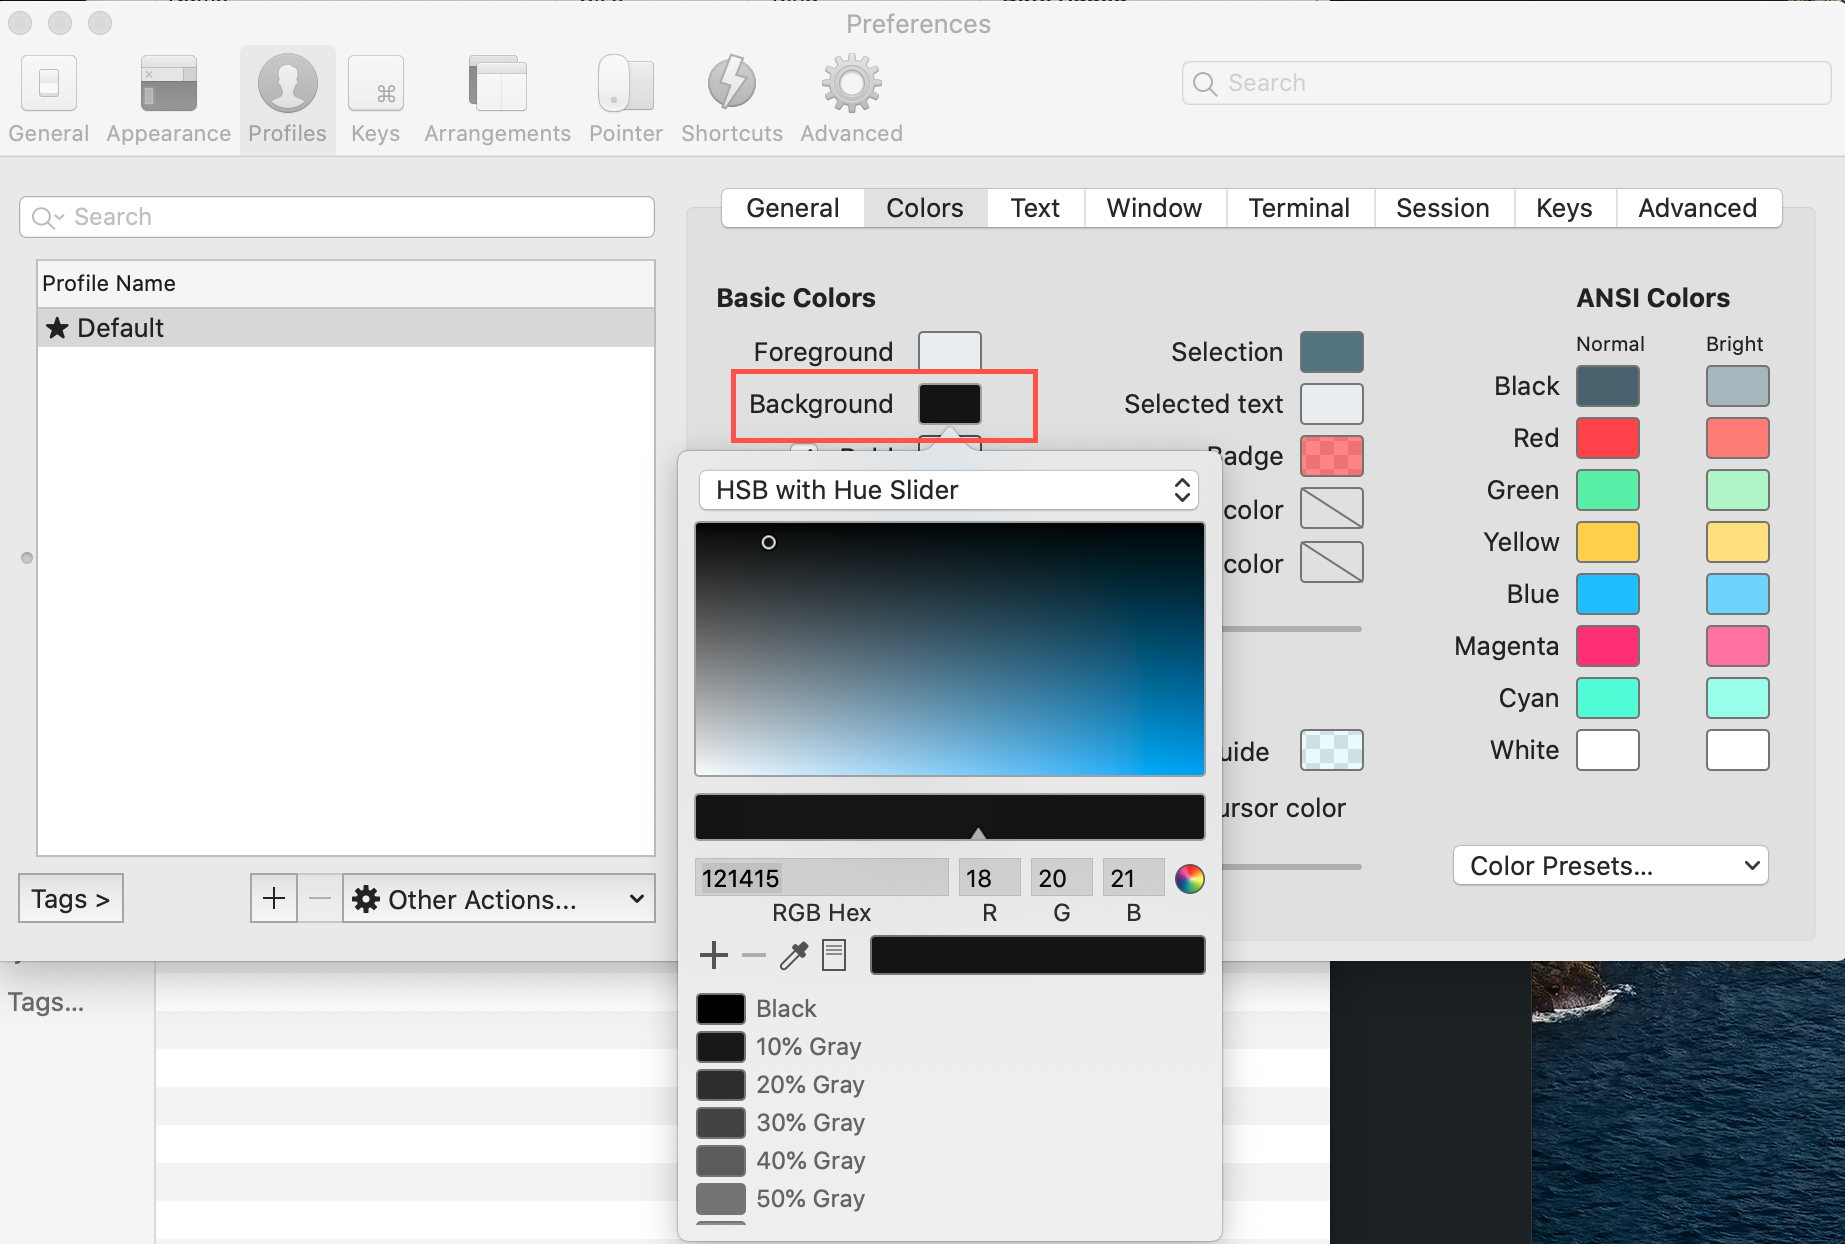
Choose your Oh-my-ZSH Theme
Beyond figuring out your color scheme, you might want to add an oh-my-zsh theme that changes up the way your commands or current directory line might look and even can give additional functionality like timestamps and more.
Here is a list of popular themes.
My personal favourite here is "Powerlevel10k":
Here an image of the different theme styles you can configure with it.
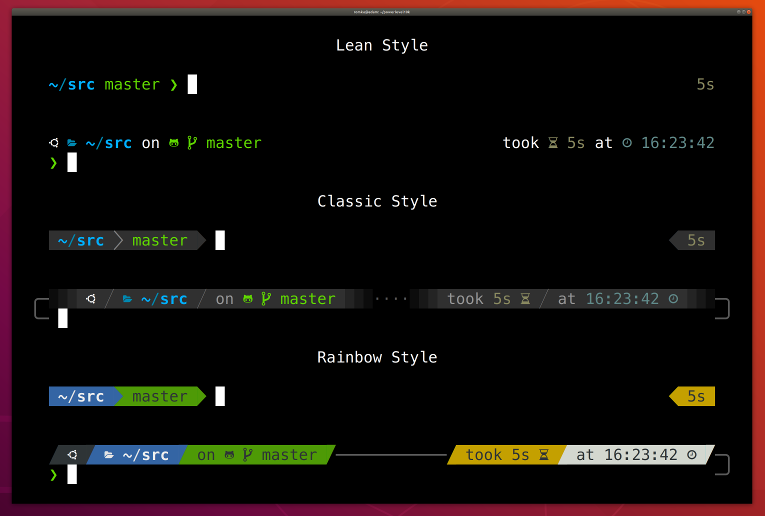
In this example, we will go through how to download the "Powerlevel10k" theme, but this is similar for all other themes too. It comes down to two steps:
1 . We will have to download the theme into the oh-my-zsh custom theme directory. In this example, we use the git clone command for this.
git clone --depth=1 https://github.com/romkatv/powerlevel10k.git ${ZSH_CUSTOM:-$HOME/.oh-my-zsh/custom}/themes/powerlevel10k
2 . Next up is changing the theme setting in our ~/.zshrc
For VI or VIM users simply type:
vi ~/.zshrc
For people that are not familiar with the vim commands or just prefer a simple text editor, type:
open ~/.zshrc
In our ~/.zshrc, you will find a paragraph that looks like this (usually third paragraph from the top):
# Set name of the theme to load --- if set to "random", it will
# load a random theme each time oh-my-zsh is loaded, in which case,
# to know which specific one was loaded, run: echo $RANDOM_THEME
# See https://github.com/ohmyzsh/ohmyzsh/wiki/Themes
ZSH_THEME="robbyrussell"
Simply change this last line to your theme name:
ZSH_THEME="powerlevel10k/powerlevel10k"
Save the file and restart iTerm and you are done!
With the "Powerlevel10k" theme you will now be prompted with a quick setup tutorial that runs you through the different options for the theme, but then you are set!
You now have a sleek looking terminal!
Functionality
Having a pretty looking terminal is nice and all, but maybe we want to add some more functionality in there too! This is where plugins and shortcuts come in.
Plugins
With "Oh-my-ZSH" we already get out of the box tons of different features that will enhance your workflow like auto-completion and others. But we want more. This is where plugins come in handy.
Depending on your setup and what languages you code in, your plugins might vary, so here is the official oh-my-zsh plugin wiki with a list of all the default plugins available..
To install plugins for VI or VIM users simply type:
vi ~/.zshrc
For people that are not familiar with the vim commands or just prefer a text editor, type:
open ~/.zshrc
In there you will find a place to add your list of plugins that you would like to install, like this:
# Which plugins would you like to load?
# Standard plugins can be found in $ZSH/plugins/
# Custom plugins may be added to $ZSH_CUSTOM/plugins/
# Example format: plugins=(rails git textmate ruby lighthouse)
# Add wisely, as too many plugins slow down shell startup.
plugins=(
    git
    brew
    heroku
    gatsby
    yarn
)
An important note here: For the plugins to load in, you will have to restart iTerm!
Set up some shortcuts: ⌘←, ⌘→ and ⌥←, ⌥→
One really useful productivity shortcut I found was how to skip a word with ⌥+←or→ or go to start/end of the line with ⌘+←or→.
iTerm does not support this out of the box, but with a few quick shortcuts added in the settings, this is quickly done. Here's how you set them up:
Open up iTerm2 preferences (⌘ + ,) -> Go to Profiles -> Keys -> Click on + icon (add new Keyboard shortcut).
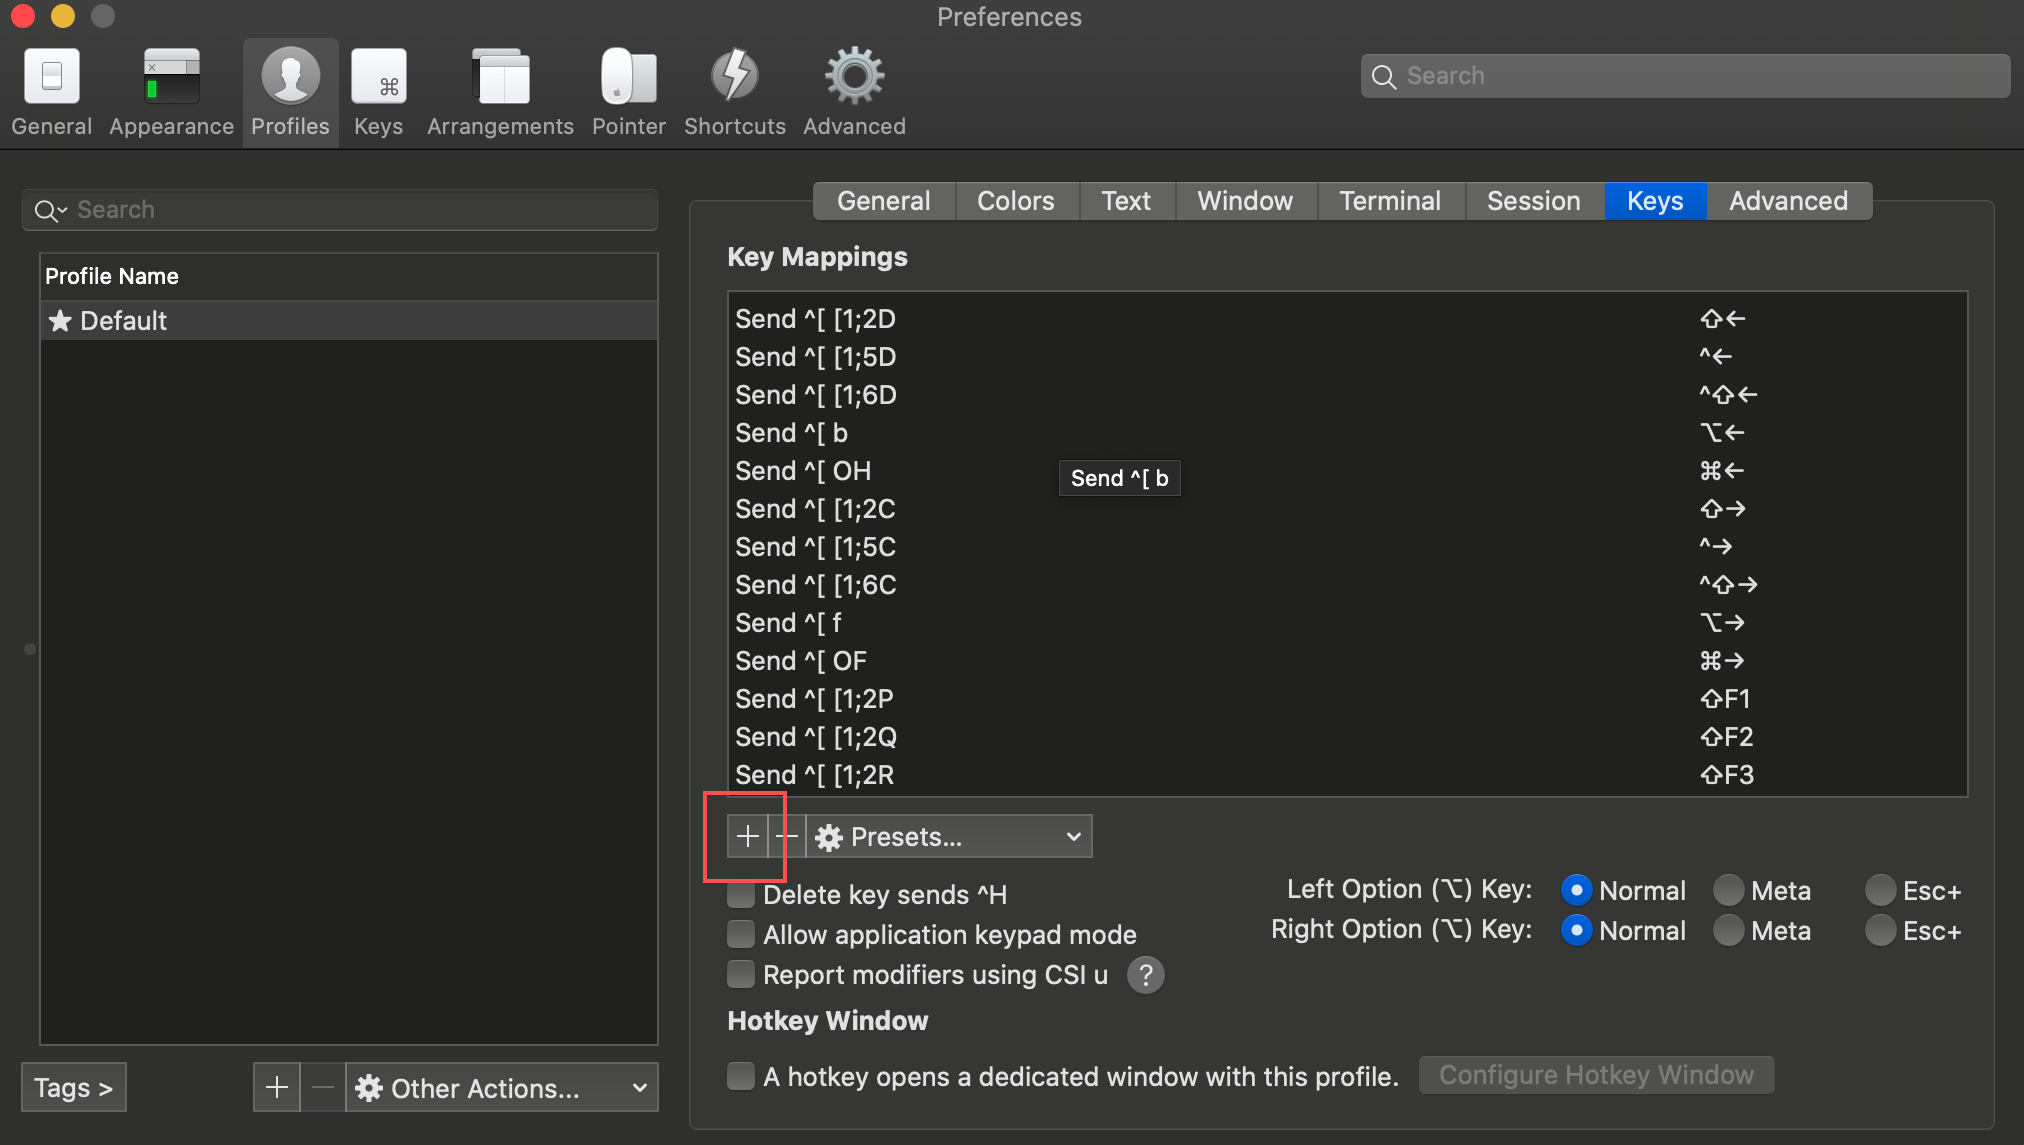
Here, you select the "Action" as "Send Escape Sequence" with following commands for "ESC+":
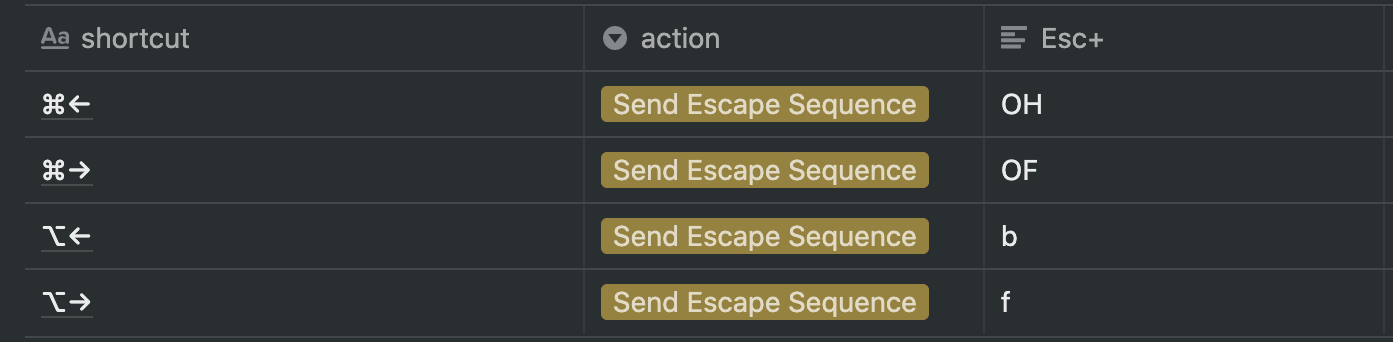
That’s pretty much it!
Thanks so much for reading this far and with this, you are ready to go with your new fancy looking terminal! Feel free to reach out to me anytime, on my website or on Twitter
Comments
Join the discussionas of 2021 instead of
brew cask install iterm2
do:
brew install --cask iterm2
Thank you! Good job.
Just going through this on a new work mac. Notes from this experience:
- Apparently
brew cask installis deprecated and is nowbrew install --cask.. not a big deal - Last couple setups I've got
Insecure completions-dependent directoriesissue. This github issue worked for me both times
This guide is great and thorough besides these two snags!
Awesome, man. I love this setup and actually had it already up to the powerlevel10k point. Never dabbled with plugins until now tho! Thanks for sharing this.
Thanks so much! The list of plugins mentioned in the post consists of only official plugins, which is already amazing, but if you wanna get really into it, try and google some custom plugins! I might put up another post about it in a few days, but here is a short list of some in the meantime! https://github.com/ohmyzsh/ohmyzsh/wiki/External-plugins
How to Iterm2 & Oh-My-ZSH
In this series, we go over set up and configuration of iTerm2 with Oh-My-ZSH. Expect beautiful themes, amazing plugins, functionality and more!